Many less expensive computer interfaces simply provide audio isolation, and do not utilize commands from computer COM ports for such functions as CW and PTT keying, firmware downloading and rig control. Most of the reputable software programs for use in computer communication do provide for advance PTT keying ahead of the actual sending of any CW or digital mode signals, thereby assuring enough time to avoid "hot switching" any mechanical antenna relays (as would happen with simply "VOX" operation). Since my primary application for the KX3 was to use it to drive an amplifier on JT65A mode during overseas 6m EME DXpeditions, it also was essential that I maintained the capability of advance PTT switching that is incorporated into all the WSJT software modes.
In summary, my goal was to arrive at an interface solution which provided:
1. Isolation of audio lines, particularly the one between the computer and the radio's microphone input
2. True CW keying from the DTR line of the computer serial port
3. Isloated PTT keying by the RTS line of the computer serial port
4. USB connection to the computer
5. As small a package as possible for portability
The only things lacking from my rquirements list were CW keying via the DTR line, and inclusion of TXD, RXD and SIGNAL GROUND directly from the serial port for rig control and firmware upgrades. Both these modifications were easily added inside the unit, and ported to the KX3 through the existing RJ45 connector, as shown in the photos below.
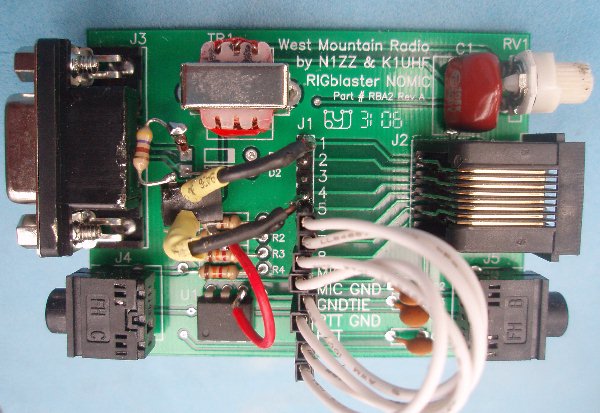 The second CNY17-3 was simply suspended in the air by rigid wires and mounted upside down "dead bug" style. The connections were as follows: PIN 1 - Attached to the 470 resistor connected to the DTR diode D1 PIN 2 - Attached to Signal Ground (RJ45 connector Pin 1) PIN 5 - Attached to RJ45 connector Pin 4 for CW KEY line to KX3 PIN 4 - Attached to PTT Ground (connected to Pin 4 on the RTS CNY17-3 on the PC board) |
As provided from the factory, DTR and
RTS lines are combined after diodes D1 and D2,
respectively. That junction is then fed
through a 680 ohm resistor to a CNY17-3 optical
coupler to isolate the PTT line. A diagram of
the CNY17-3 is shown below. 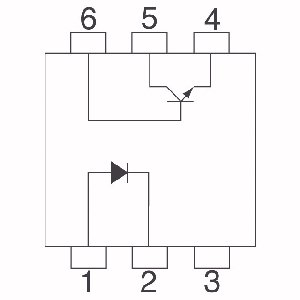 To separate out the DTR line, the striped end of diode D1 was cut where it meets the printed circuit board, so the diode could be pulled upright and a 470 ohm resistor could be soldered to the end. The other end of that resistor was soldered onto pin one of a second CNY17-3, as shown in the photo to the left. |
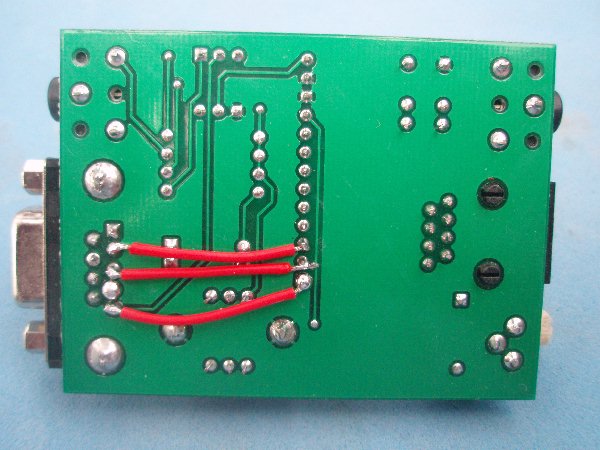 The RX (DB9 pin 2), TX (DB9 pin 3) and SIGNAL GROUND (DB9 pin 5) lines from the DB9 connector were connected directly over to the first three RJ45 pins by soldering jumpers onto the bottom of the board, as shown in the photo above. |
The NOMIC was designed to interface
with transceivers having a standard 8 pin microphone
connector via the 8 pin RJ45 connector on the
unit. Customization for various radios is made
by connecting jumpers inside the unit to the desired
pins of the RJ45 jack. The microphone cable with the
RJ45 was cut and three shielded stereo cables were
spliced into it, according the table to the
right. The standard 3.5mm stereo plug was
Digi-Key part number CP-3502-ND. The KX3 3.5
mm 4 conductor plug was Digi-Key part
number CP-35401SP-ND . The
splices were each wrapped in plastic tape then all
were covered with a piece of heavy 5/8" ID
heat shrink tubing from the electrical department of
a big box hardware store, as shown in the photo
below: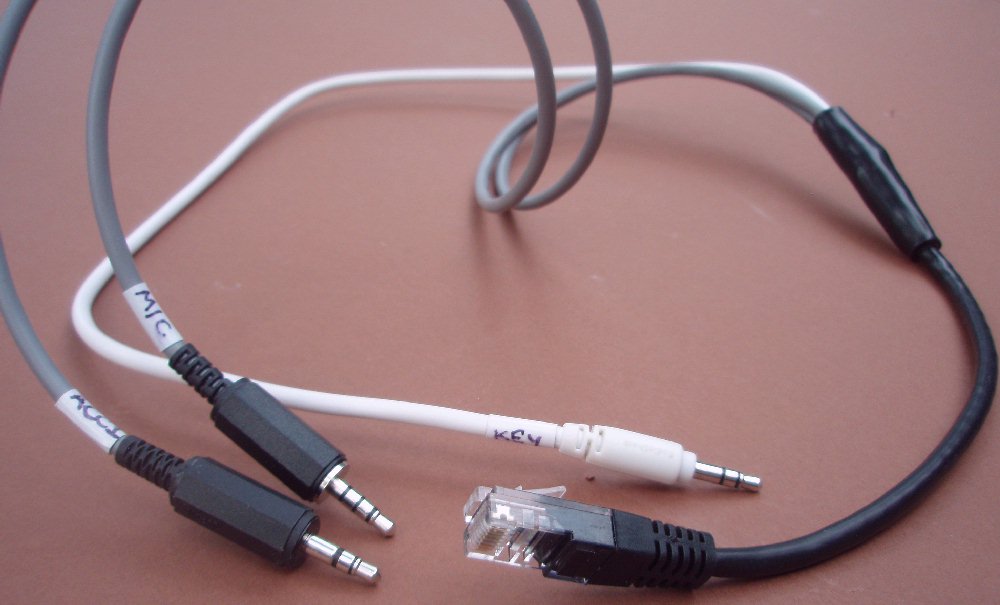 |
TABLE OF NOMIC RJ45 CONNECTIONS FOR THE KX3 RJ45 NOMIC INSIDE CONNECTED 3.5 MM CABLE PIN # CONNECTION TO CABLE CONNECTOR 1 Hard wired to DB9 Pin 5 ACC1 Shield 2 Hard wired to DB9 Pin 3 ACC1 Tip 3 Hard wired to DB9 Pin 2 ACC1 Ring 4 Hard wired from Pin 5,DTR chip CW KEY Tip 5 Jumpered from PTT GND CW KEY Shield 6 Jumpered to MIC Out MIC Tip 7 Jumpered to MIC GND MIC Shield 8 Jumpered to PTT OUT MIC Ring 1 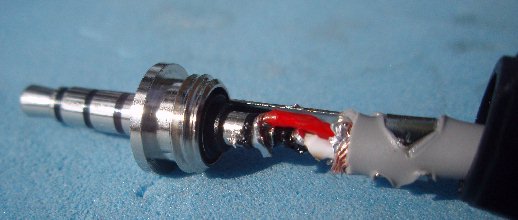 Detail of the MIC plug
connections for the KX3.
|
In order to permit use of a boom
microphone with the KX3, and allow for the
possibility of using a footswitch or other means to
key the radio, an auxiliary MIC cable was prepared
to accept a 2.5mm footswitch plug for PTT or a
standard stereo 3.5mm microphone plug. 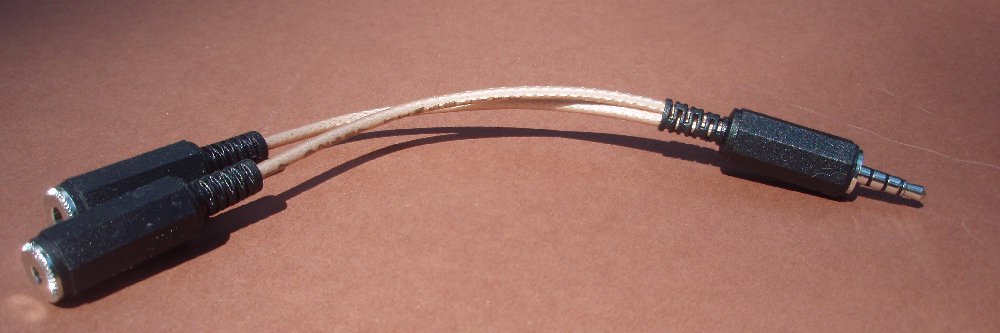 |
An additional custom cable was made
to key the amplifier. Ring 2 of the 2.5 mm
ACC2 jack on the KX3 was connected to a shielded
cable that terminated in an RCA plug to interface
with the PTT of my 6M-1000 amplifier. The 2.5
mm stereo plug was Digi-Key part number
CP-2501SP-ND.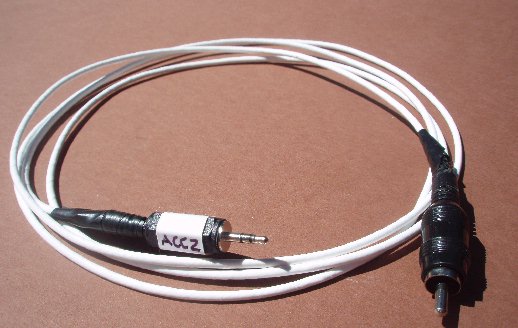 |